


Automate Your Outdoor Lights: Dusk-to-Dawn and Motion-Triggered Lighting for Australian Homes
Manual outdoor light switches are a relic. Coming home after dark to a black driveway, fumbling for the switch, or leaving the porch light on all night wasting electricity — none of it is necessary. This guide covers the three main approaches to automating outdoor lighting in Australian conditions, and which parts you can do yourself.
Three approaches to smart outdoor lighting
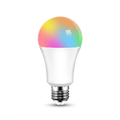
Option A: Smart globe in an existing outdoor fitting
If you already have an outdoor wall light or carport fitting with a B22 or E27 socket, the simplest upgrade is a smart globe. Use one only in a covered fitting that shelters it from direct rain, and never in a fully sealed fitting in direct sun, where trapped heat shortens its life.
This is the only option you can do entirely yourself — it screws in like any other globe.
Option B: Smart switch controlling existing outdoor lights
Replace the indoor wall switch that controls the outdoor light. This works with any existing outdoor fitting — no need to change the globe or the light itself. The switch stays indoors; only the fitting is outside.
This is mains wiring, so it must be installed by a licensed electrician in Australia. It is not a DIY job, regardless of what overseas tutorials suggest.
Option C: Low-voltage outdoor LED lighting
Waterproof 12V LED strip and bar lights run from a low-voltage supply rather than mains, which makes them a genuinely DIY option for verandahs, decking, pergolas, caravans and boats. No electrician, no switchboard work — and because they are low voltage, they are safe to handle while wiring up.
The smartest outdoor upgrade is often a sensor, not a light
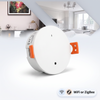
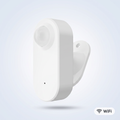
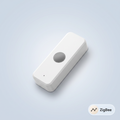
Worth knowing before you spend anything: you do not have to replace your outdoor lights to automate them. A motion or presence sensor paired with a smart globe or switch gives you motion-triggered lighting using the fittings you already own — and the sensor can trigger other things at the same time, like a phone alert or an indoor light.
Mount the sensor under an eave or verandah where it is sheltered from direct rain.
Australian weatherproofing — IP ratings explained
Australia's climate varies enormously — coastal humidity, tropical monsoons in the north, alpine frost, and scorching summer heat almost everywhere. Select outdoor equipment by its IP (Ingress Protection) rating:
- IP44: Protected against splashing water. Covered outdoor areas only — verandahs and soffits not directly exposed to rain.
- IP55: Protected against water jets. Suitable for exposed outdoor walls and driveways.
- IP65: Dust-tight and protected against low-pressure water jets. Suitable for most Australian outdoor locations.
- IP67: Can be temporarily submerged. Suitable for ground-level garden installations and areas prone to pooling.
For most Australian outdoor applications: IP55 minimum, IP65 for anything exposed or coastal.
Step 1: Set up dusk-to-dawn automation
All three major ecosystems support sunset and sunrise triggers based on your home's location, so the times update automatically through the year — which matters in Australia, where sunset moves from around 5pm in June to past 8pm in December.
Smart Life: Scene → Automation → Schedule → Sunset or Sunrise, with an optional offset.
Google Home: Automations → Add → Time of day → Sunset or Sunrise.
Apple Home: Automations → A Time of Day Occurs → Sunset or Sunrise.
Alexa: Routines → + → Schedule → Sunset or Sunrise.
Create two automations: one at sunset to turn the lights on, and one at a fixed hour such as 11pm to turn them off. Otherwise they run all night for no benefit.
Step 2: Add motion triggering
Motion-triggered outdoor lighting is one of the most effective and cheapest deterrents there is. Create an automation: when motion is detected after sunset and before sunrise, turn the outdoor lights to full brightness for five minutes, then drop back to low or off.
Add the darkness condition, or every daytime delivery sets your floodlight blazing. In Smart Life this is a condition on the automation; in Google Home and Alexa it is a “only between sunset and sunrise” restriction.
If you are getting false triggers from passing cars, reduce the sensor's sensitivity and angle it down and inward so its field of view covers your property rather than the street. A presence sensor is also less prone to triggering on distant movement than a basic PIR.
Simulated occupancy for security
When you are away, vary your outdoor and indoor lights on a slightly random pattern between 7pm and 10pm. A light that switches on at exactly 7:00pm every night reads as automation; one that varies reads as somebody home.
Frequently Asked Questions
Can I install outdoor smart lighting myself?
A smart globe into an existing socket — yes. Low-voltage 12V LED strip — yes. Replacing a fitting or wall switch is mains wiring and legally requires a licensed electrician in Australia.
What IP rating do I need?
IP55 minimum for sheltered areas. IP65 for exposed walls and driveways. IP67 for ground level where water pools.
Do they adjust for daylight saving?
Yes, if you use sunset/sunrise triggers rather than fixed times — including AEDT/AEST transitions.
Can I automate my outdoor lights without replacing them?
Yes — a motion or presence sensor can trigger a smart globe in your existing fitting, and alert your phone at the same time.
How do I stop false triggers from passing cars?
Lower the sensitivity, angle the sensor down and inward, and add a dusk-to-dawn condition so it never fires in daylight.
Light up your outdoor space
Browse PureNode's motion and presence sensors for triggering existing lights, smart lighting for covered fittings, and our garden and outdoor range including waterproof 12V LED bar lights. Every product page lists its IP rating where relevant, and whether a hub is required.
Products in this guide
The devices mentioned above, in stock and shipped free Australia-wide.
Not sure where to start?
Browse our under-A$100 picks — the essentials most people start their smart home with.